
Getting ready to cut a steek might feel a little bit like making that long climb up to the high diving board. There is comfort in the rhythm of each step up, and each squeeze of the railing, but you know when you get there, you are going to have to jump. I have a memory of climbing all the way to the top once, sitting on the edge of the diving board looking down for a few minutes while everyone behind me waited, then excusing myself as I climbed all the way back down. We don’t want to lose our nerve when finishing our beautiful garment that we have spent months knitting, right? So, I thought it might be helpful to post some photos and notes of my step-by-step process. You can also take a look here, at a previous blog post I wrote about it. I hope this will help you to feel safer about the climb, and later, the jump.
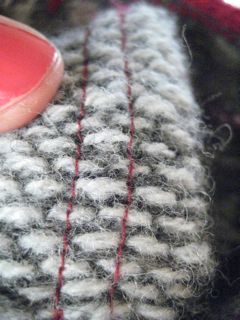
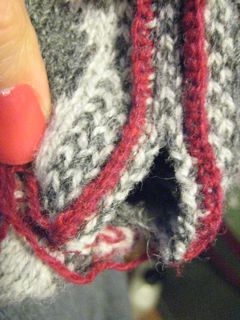
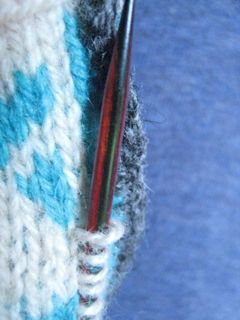
These are shots of the teapot handle hole steek on my Kate Davies Carousel tea cozy. I have crocheted through the stitches, either side of the centre cutting line. I used a crochet hook one or two sizes smaller than the knitting needle size that I used to knit the piece. In this case, I used the same weight of yarn, a 4-ply wool.
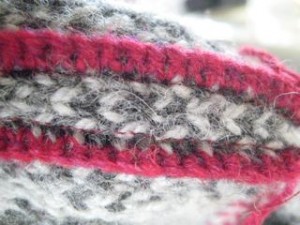
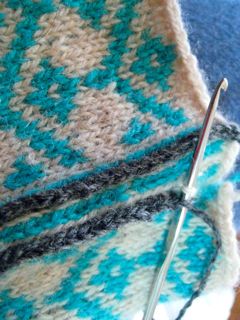
I then put the zipper foot on my sewing machine and stitched really close to each line of crocheting. On the wrong side of the knitting it looks like the picture above. This is really for my peace of mind. On an edge that will get a lot of wear, I think a little more reinforcement is a good idea. You can hardly see the stitching on the right side, because it is tucked right in close to the crocheted stitches. I used the same colour thread as the crochet yarn.
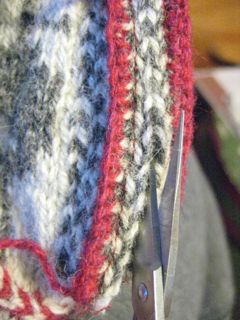
I used steeking scissors that I bought from Knitpicks to make the cut. They are extremely pointy and sharp. No running allowed! Find the centre stitch. If you think you may drift, baste some contrasting waste yarn up that corridor to guide you.
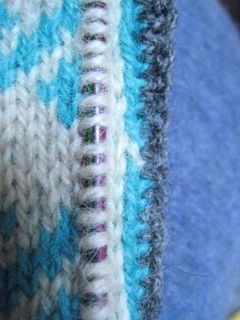
The cut stitches cannot get very far with all that reinforcement.
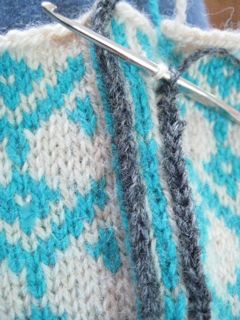
Here are the same steps on my Ursula swatch. I used a high contrast yarn for my swatch, but a matching colour for the real thing. I am crocheting the left leg of one stitch with the right leg of the next. In this case there is a 7 stitch steek, but I prefer a 9 stitch width so that the cut is farther away from the reinforced edge. I often adjust patterns to accommodate this.
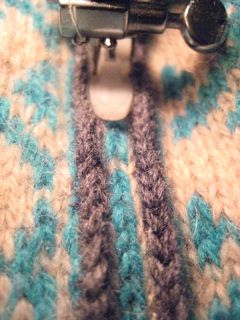
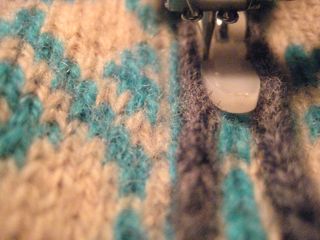
You can see how the zipper foot pushes the crocheted stitches out of its way, and the needle gets in really close.
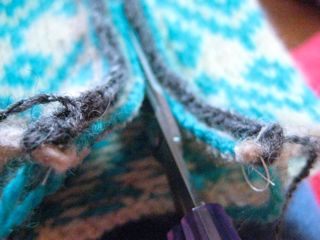
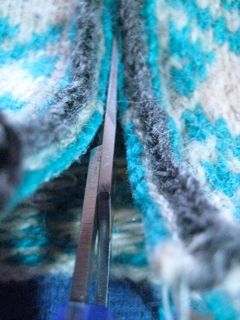
I cut really slowly, often only one stitch at a time. I am really happy with this reinforced edge and feel safe to start working the edge now.
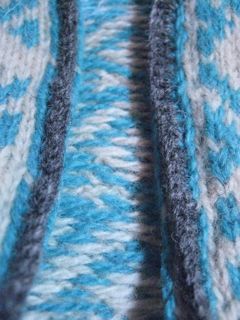
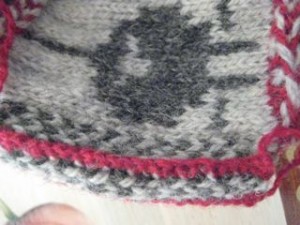
Now the fabric will be folded along the pattern line to pick up for the edging, a button band in this case.
I hold the yarn under the fabric, pick it up with the needle going through right side to wrong side, then pull the stitch up to the right side. I pick up into every stitch, then reduce down to the ratio I need for a flat edge, typically 3 out of 4 stitches. This would mean that in the first row of the edging I would be working a rhythm of work 2, work 2 together.
I will post more pictures and notes from my Ursula soon. This garment has a steeked front opening, as well as a steeked neck opening, and both armholes. The whole garment has been worked in the round, from the bottom edge to the top, without any interruption of the fair isle colourwork.
There are different opinions and methods about this process, and it makes sense for you to assess your own needs when it comes to steeking. The important thing is that you feel confident and at peace as you knit. Your finishing should be exquisite, and learning the techniques that make this possible, takes patience and practice. We knit because we value the beauty of hand work, and have the passion to stick with it, to see a project through to the finishing. If you need any help with this, please get in touch. I would be really happy to help you.
I’ll see you again soon. Thank you so much for reading my blog!